
3 posts tagged with "elevator"

View All Tags

Happy 244th Birthday!

· 3 min read

It's independence day! And about a month since my last update. Steady progress due to quarantine, knocking out little projects every day.

Empennage Attachment

I think in the last month, I wrapped up the empennage attachment section finally. Got a DC power adapter to bench test the trim servo, and it's incredibly satisfying when it actually moves. Not 100% done, as my trim tabs don't go the full 35 degrees nose down, but I'm leaving that for another day. I think I may need to pull the cables out of the HS and adjust the travel, which means I need to redo all my work there, including reattaching the cover plates and I just don't have the energy to tackle that again right now. Definitely have reverse travel at the top end, where my right trim tab continues to travel up and my left trim tab starts deflecting down again, so will need to look at that too.

Fuel system install

Started tackling the fuel system install too this month. Put in a tunnel access panel on the passenger side, which is all I think I need since only my fuel pump is going into this space. My two fuel filters are instead going to go in the wing root of each tank, which should allow for easier maintenance in the future and less spilled fuel in the cockpit. TS Flightlines put together my hose kit, and I'm installing per their install documents, planning for an SDS system. If you take this route, you'll need LP4-4 rivets for the fuel pump attachment angles as the thickness with the reinforcement plate is about 0.19 just a bit over the grip length of the LP4-3 rivets Vans specs in this location. Also, instead of following the instructions and cutting out the stock fuel selector attachment piece to fit the Andair valve, I cut a piece of aluminum and riveted it on instead. IMO this is superior as you don't need to do extra work cutting metal and the stock piece acts as a doubler. Here's a shot of the new piece I fabbed:

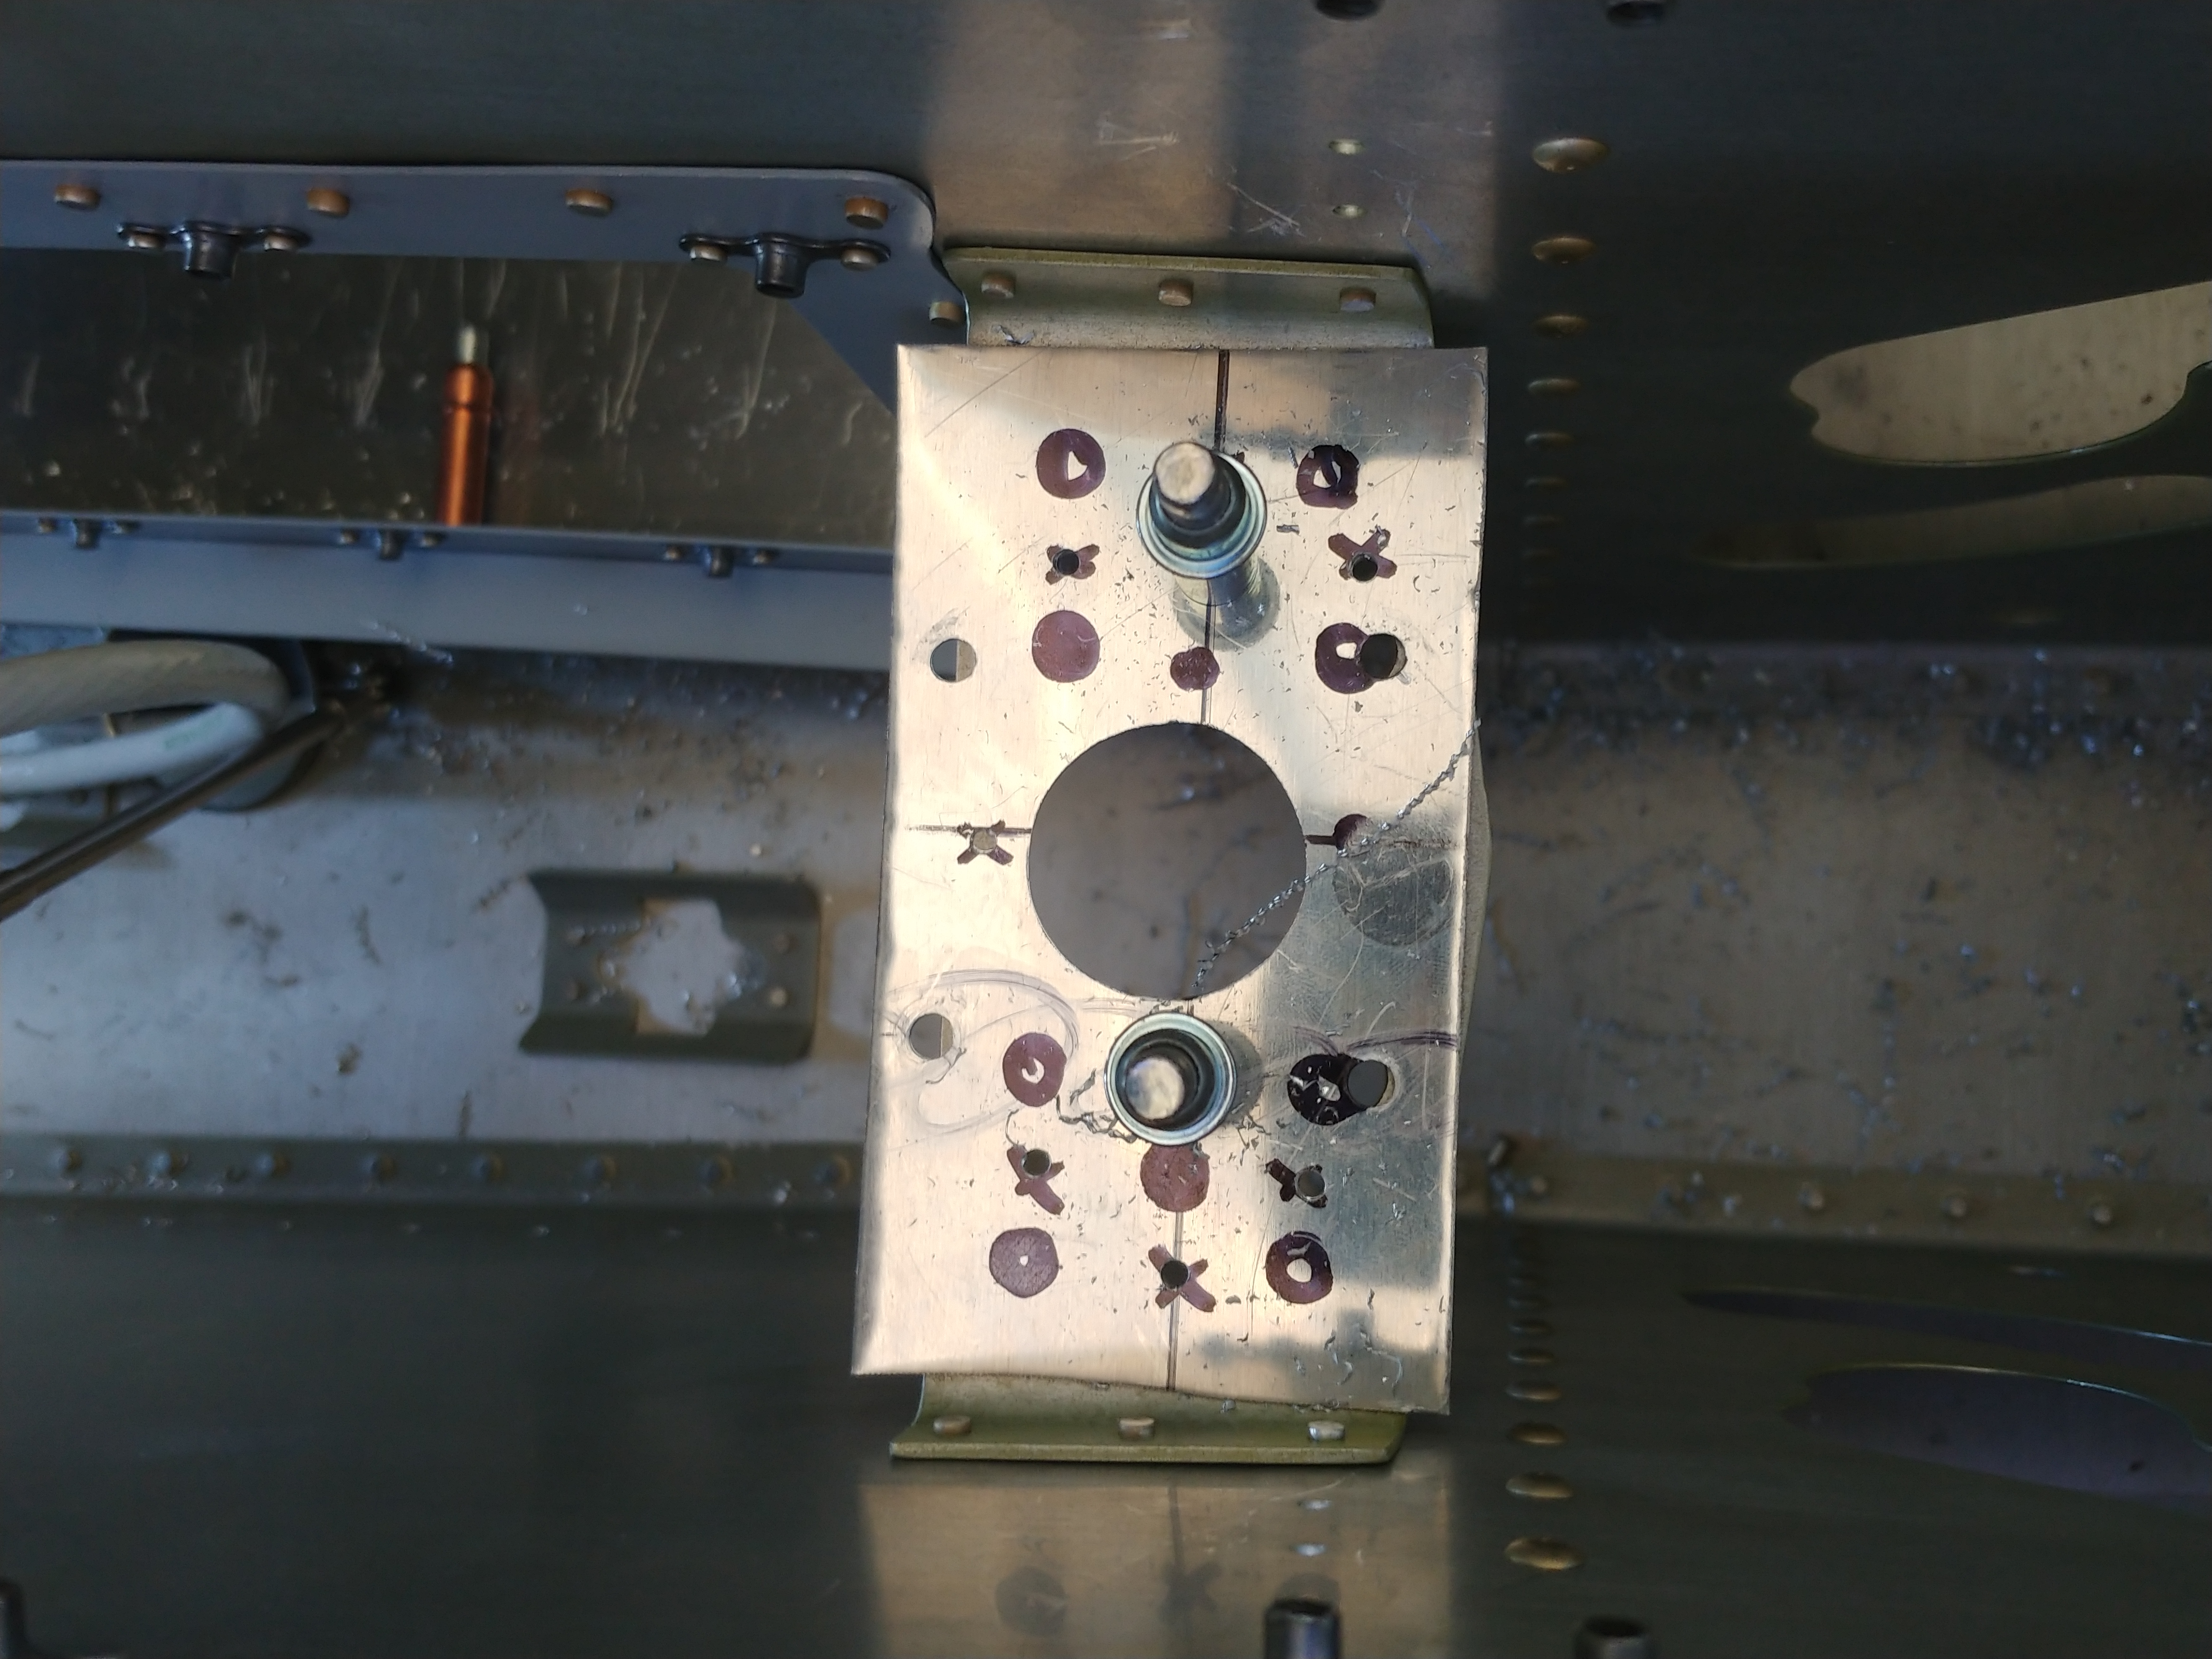
The circles are traced from the stock fuel selector attachment piece. Then I drew X's where I would drill rivet holes, put the new piece on top of the stock attachment plate and match drilled.

Next up, need to work out which hoses go where and put the fuel system in.

Mother-of-all-update-posts

· 4 min read

It's been 4 months since my last update. Between a website and theme that was falling apart and the holiday's, I elected to focus on building the plane instead of doing any updates. My goal here is mainly to summarize deviations and other issues I found while building, and I think going forward that is what I'm going to be focusing on with this blog.

With that said...

Horizontal Stabilizer

After screwing up the spar, I got a new spar from Vans and worked through the Horizontal Stabilizer. Two things to note here.

  1. Count your rivets. You're going to be depleting 1 or 2 bags of rivets here. If you messed up or dropped your rivets anytime in the past, now would be the time to count your rivets and order more if you need them. I had to order more LP4-3's and some AD3's.

  2. I went into this in detail at the VAF post here. Reproduced below:

I ran into issues riveting this section and I did a search on VAF and builder websites but I didn't see anyone else specifically address this section so I'm assuming this may be a unique problem due to my circumstances, but I want to document what I did in case anyone in the future runs into this issue.

Problem: It's a PITA to rivet the 40 rivets between the middle HS-905 nose ribs and the skins. Lots of rivets got drilled out and holes were enlarged on the middle nose ribs.

Possible contributing factors:

  1. I'm short. With an EAA-1000 table and the cradle, I need to stand on the tip of my toes AND tip the horizontal stabilizer to even reach some of the holes at the bottom.
  2. I used a shortcut and used nylon straps instead of the plywood that Vans calls out. While this saves a bit of time for those of us that don't have wood working tools handy, it also means that the HS is free to move about in its cradle.
  3. I could not scrounge up any helpers. Being young, single, and living in a rural area that you recently moved to will do that to you.
  4. I only have two hands and could not locate more, see 3.

Some more explanation:

My assumption at this point is that the biggest factor is the nylon straps. I've seen other builders use this as it allows you to maneuver the HS around while still in it's cradle so you can get to stuff, but when you are riveting the nose ribs in essence you need one hand to hold the rivet gun, another hand to hold the bucking bar and one more to hold the HS in place. Allowing it to slip towards you means the rivet slips out. It may potentially not be an issue if you are tall enough so that your hand can get all the way to the leading edge of the HS without tipping the horizontal stabilizer towards you. It will also potentially not be an issue if you followed the plans and built rigid cradles. All of this would be downright easy if you have another person helping you.

With all that said....solutions:

  1. Tape. This should really be a given at this point but I didn't realize how much help this would be until rib #2. Tape the rivets, this frees up a hand and prevents it from slipping out. Unfortunately tape doesn't help shortness, but after I taped the rivets, I only had to use solution #2 maybe 3 or 4 times.

  2. Blind rivets. I talked to Vans Support to see if I'm just missing something huge, and they basically said everything I did was correct, however if I wanted to substitute blind rivets, MK-319-BS blind rivets are acceptable. I swapped in one of these if any of the rivets were particularly annoying. Mostly the first ones on the leading edge. The downside per Van's is they are not as pretty and they are a bit heavier.

  3. Six pack of beer. Apparently this can summon extra hands. I did not have beer handy, which may be the reason for my predicament.

A quick photo showing my setup. You can see how the nylon straps allow a substantial amount of movement to either side.

Elevators

Not much to say here. Finished them, leaving the trib tabs for now because I oversqueezed them. Fun. Waiting for the replacement skin to ship from Vans.

Tailcone

This is fairly new actually, started this part a few days ago. I'm renovating the other 3/4s of the house, so I took over the dining room.

It's...rough.

Elevator Riveting

· 3 min read

Bought another can of proseal from Van's. Turns out I still can't get away from a messy evening even after discovering 3M tape. The proseal is needed for sealing the foam ribs to the elevator. Also, 9-10 has a throwaway line to mask off the areas needed for the foam ribs so the proseal can bond directly to aluminum. I found it much easier to prime, and then sand off the primer in the areas needed, especially since I'm using rattle can primer. The primer and the alclad came off with a few seconds of sandpaper mounted to a die grinder.

Then comes the task of backriveting everything into place. This should be fairly familiar after the rudder, nothing out of the ordinary here. Might be worth it to make sure you have 256 AN426AD3-3's, I only had 200 or so, I guess Van's maybe should up the weight of that particular bag? Not an expensive fix though, $6 to aircraft spruce resolved the issue.

Minor Corrections

I've been doing a lot of small fixes here and there as part of prepping the elevator. In 9-6 I think, the manual asks you to dimple the reinforcement plates to accept #6 screws. Of course, this is a weird size. You could buy a special #6 die, I think cleaveland aircraft tool sells them, but the 5/32 you probably have is good enough. Make sure to dimple those before you start riveting.

I also went ahead and dimpled the rest of the elevator rear spar and the two root ribs. The issue was nothing I had fit those spaces in the orientation I needed. I could of course eyeball it and hold the female side over the hole, but you end up with figure 8 dimples more often than not. The tool that I ended up finding was shown in one of Jason Ellis' Youtube videos. I'm not a religious viewer so I'm not sure if he ever mentioned where he got the tool, but it's essentially a pair of vice grips with a hole drilled in each jaw to fit the dimple dies. I grabbed mine from Aircraft Tool Supply. They did the job but they were not fun to use. Compared to the Vice Grips that I owned, these were substantially lower quality, so it took a lot of effort to unlock them. It may be worth it to see if you can get a pair of quality vice grips, one with enough leverage, and drill a hole yourself. The dimples will come out a bit underdimpled unless you put a lot of force behind the grip, I'm a bit spoiled with my pneumatic dimpler.

Time and Cost

Money spent so far:

CategoryBudgetSpent
Tools38004200
Shipping300724
Empennage43104370

Time spent so far:

TaskTime
Shop36
Vertical Stabilizer*36
Rudder*30
Horizontal Stabilizer6
Totals:108

*Finished